Creating and Uploading NuGet Packages to a Private ProGet Repository

Creating and Uploading NuGet Packages to a Private ProGet Repository
ProGet lets you set up private NuGet repositories to publish, store, and share your internal NuGet packages within your organization.
As shown earlier, begin by following the steps to create a NuGet feed. This time, select Private/Internal NuGet (.NET) Packages, since this feed will only host private packages:

Next, name your private feed–for example, internal-nuget and select create feed:
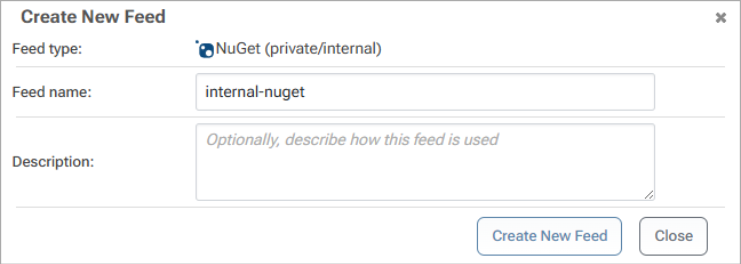
ProGet will create your internal-nuget feed, which will currently be empty:

Creating a NuGet Package
In Visual Studio, you can create a NuGet package by following these steps:
1. Create a class library project by selecting the Class Library template, choosing a suitable framework, then building the project to ensure it’s set up correctly.
2. Configure the NuGet package properties by accessing Project Settings, ensuring the Package ID is unique, and other details are filled out.
3. Use the Pack command in Release Configuration to generate a .nupkg file, checking the Output Window for its location.
For more details, see Microsoft’s Official Documentation.
Creating a project in dotnet is easier to demonstrate visually, and shows the individual files that make up a NuGet package. To start, create the project in the dotnet CLI by entering:
$ dotnet new classlib -n MyPackage
$ cd MyPackage
In the project folder, create a .nuspec file, that will contain the package metadata. For example:
<?xml version="1.0"?>
<package>
<metadata>
<id>MyPackage</id>
<version>1.0.0</version>
<authors>Your Name</authors>
<owners>Your Organization</owners>
<description>A simple example NuGet package.</description>
<language>en-US</language>
<tags>example</tags>
</metadata>
</package>
Then run the following command to create the package:
$ dotnet pack --configuration Release
Add Your Internal Feed as a Source
Adding your internal-nuget feed as a source in Visual Studio, the nuget CLI, or other clients like VS Code and JetBrains Rider, requires your internal-nuget feed URL found at the top right of your feed page:

Then, simply follow the steps shown earlier, to connect your ProGet feed to Visual Studio.
Pushing Your Package to Your NuGet Feed
You can push your NuGet package using either Visual Studio or the NuGet CLI—just ensure your feed is added as a source and authentication is configured.
To push your NuGet package using Visual Studio, open the Package Manager Console by navigating to Tools > NuGet Package Manager > Package Manager Console. Then, run the following push command:
$ nuget push «path-to-package» -Source «source-name» -ApiKey api:«apikey»
Example:
Pushing the package MyPackage to a configured source named internal-nuget, you would enter:$ nuget push bin\Release\MyPackage.1.0.0.nupkg -Source internal-nuget -ApiKey api:abc12345
Your package will then be uploaded and listed in your NuGet feed:

(Optional) Repackaging NuGet Packages in CI/CD
After publishing, consider repackaging pre-release versions into stable, production-ready packages to improve your CI/CD workflow. This also maintains an audit trail showing who performed the operation and when. For details, see Repackaging NuGet Packages.
Troubleshooting (Authentication Error)
An error may occur when trying to browse the authenticated NuGet feed in Visual Studio:

The window does not fill with packages and the error list says “API Key … does not exist.”
There may have been an error entering the personal API key while connecting to the server, or the API key may have been deleted in ProGet.
To resolve, in Visual Studio, close all your instances.
Then, in Windows, open the Control Panel and navigate to Credential Manager:

Under Windows Credentials, delete the one named as the ProGet host (in this example, 3.144.230.132):

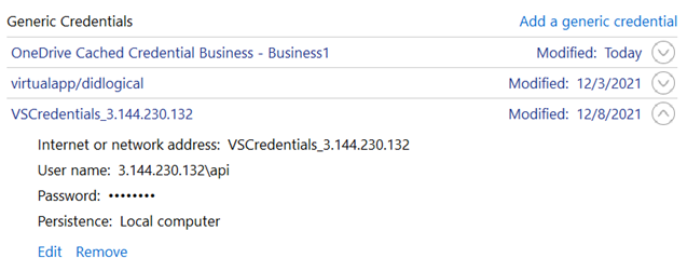
Under Generic Credentials, find and remove the one named “VSCredentials…” (in this example, VSCredentials_3.144.230.132):
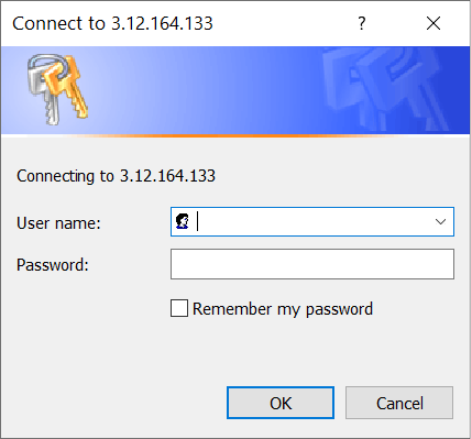
Now, in Visual Studio open your instance and navigate to the Package Manager. You will be prompted again to enter a Personal API key: api for the username, and your API key as the password: